Tag Archives: mixed climbing

M is for Munter (how to tie one), Mountains, Lady Mac, and Mixed Climbing

M is for mixed climbing, Munter and … and maybe mountains… and what about multi-pitches… Keep scrolling down if you want to get to the good part (the Munter video!)

On the first day of this challenge I was pretty sure I could dredge up something to say about climbing for each day of the alphabet… on about day five (E is for whatever E was for… M might also be about memory, or lack thereof…) I was feeling pretty panicky. I mean, you can only say so much about going up and not falling off, right? Well today I’m sitting here looking at my shortlist of M-words and I’m thinking that if I’m not careful this could develop into a long blog post!

PC123269.JPG

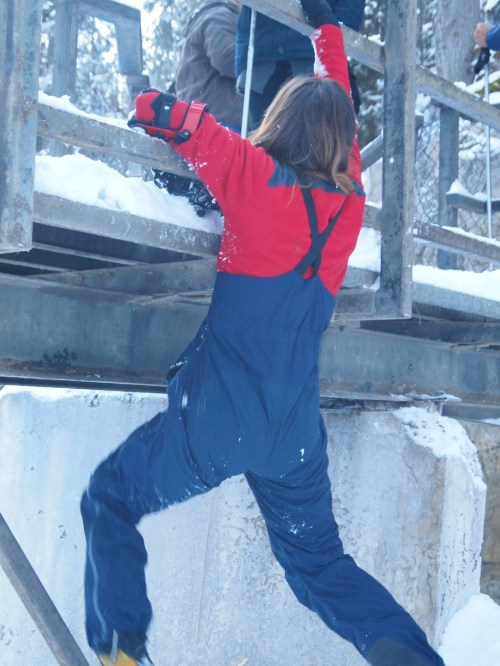
Me trying something waaaaaay too hard in the mixed climbing department. Sometimes you have to go past your limit to find the line in the sand… rock… ice… wherever. In this case, the line was about as high as you see here – just low enough, in fact that each time I fell off (many times) the rope stretch allowed me to gently hit the ground. With my backside.  

I’ll start with mixed climbing, a sub-genre of the climbing activity about which I had no idea before this past winter. In the vertical world in the dead of winter two solid forms (ice and rock) come together in the mountains. Climbing when you wind up transitioning from one to the other (and sometimes back again) is known as mixed climbing. The tools used are similar to ice climbing, but look closely and small difference begin to emerge.

Crampon points, for example. On a straight ice climb two front points give you a wider, more secure base upon which to perch (though, there are those who climb ice quite handily with mono-points). If there’s going to be a lot of rock on the route, though, it’s actually easier to climb with a mono-point, a single front prong. This is because the plane of the rock is very rarely exactly perpendicular to your foot placement. Unlike in ice where you can kick your foot in to create a more or less even distribution of weight over both points, on the rock, more likely you are going to carefully place your single point into an indent, small hole, or on a modest lip of rock. The chances of said placement point being exactly wide/deep/level/spaced to accommodate two fixed points on the front of your boot is slim.

Likewise, the blades of your ice tools can be swapped out with sturdier, less razor sharp options being better for rock than for ice. Fabio has a tool kit in the car especially for the purpose of swapping out pointy bits to best suit conditions.

Though both sections (rock and ice) of a mixed climb can be hard, sometimes the transitions between one and the other provides a particularly tricky challenge.

IMG_0014 nikki haffner half half 06-3

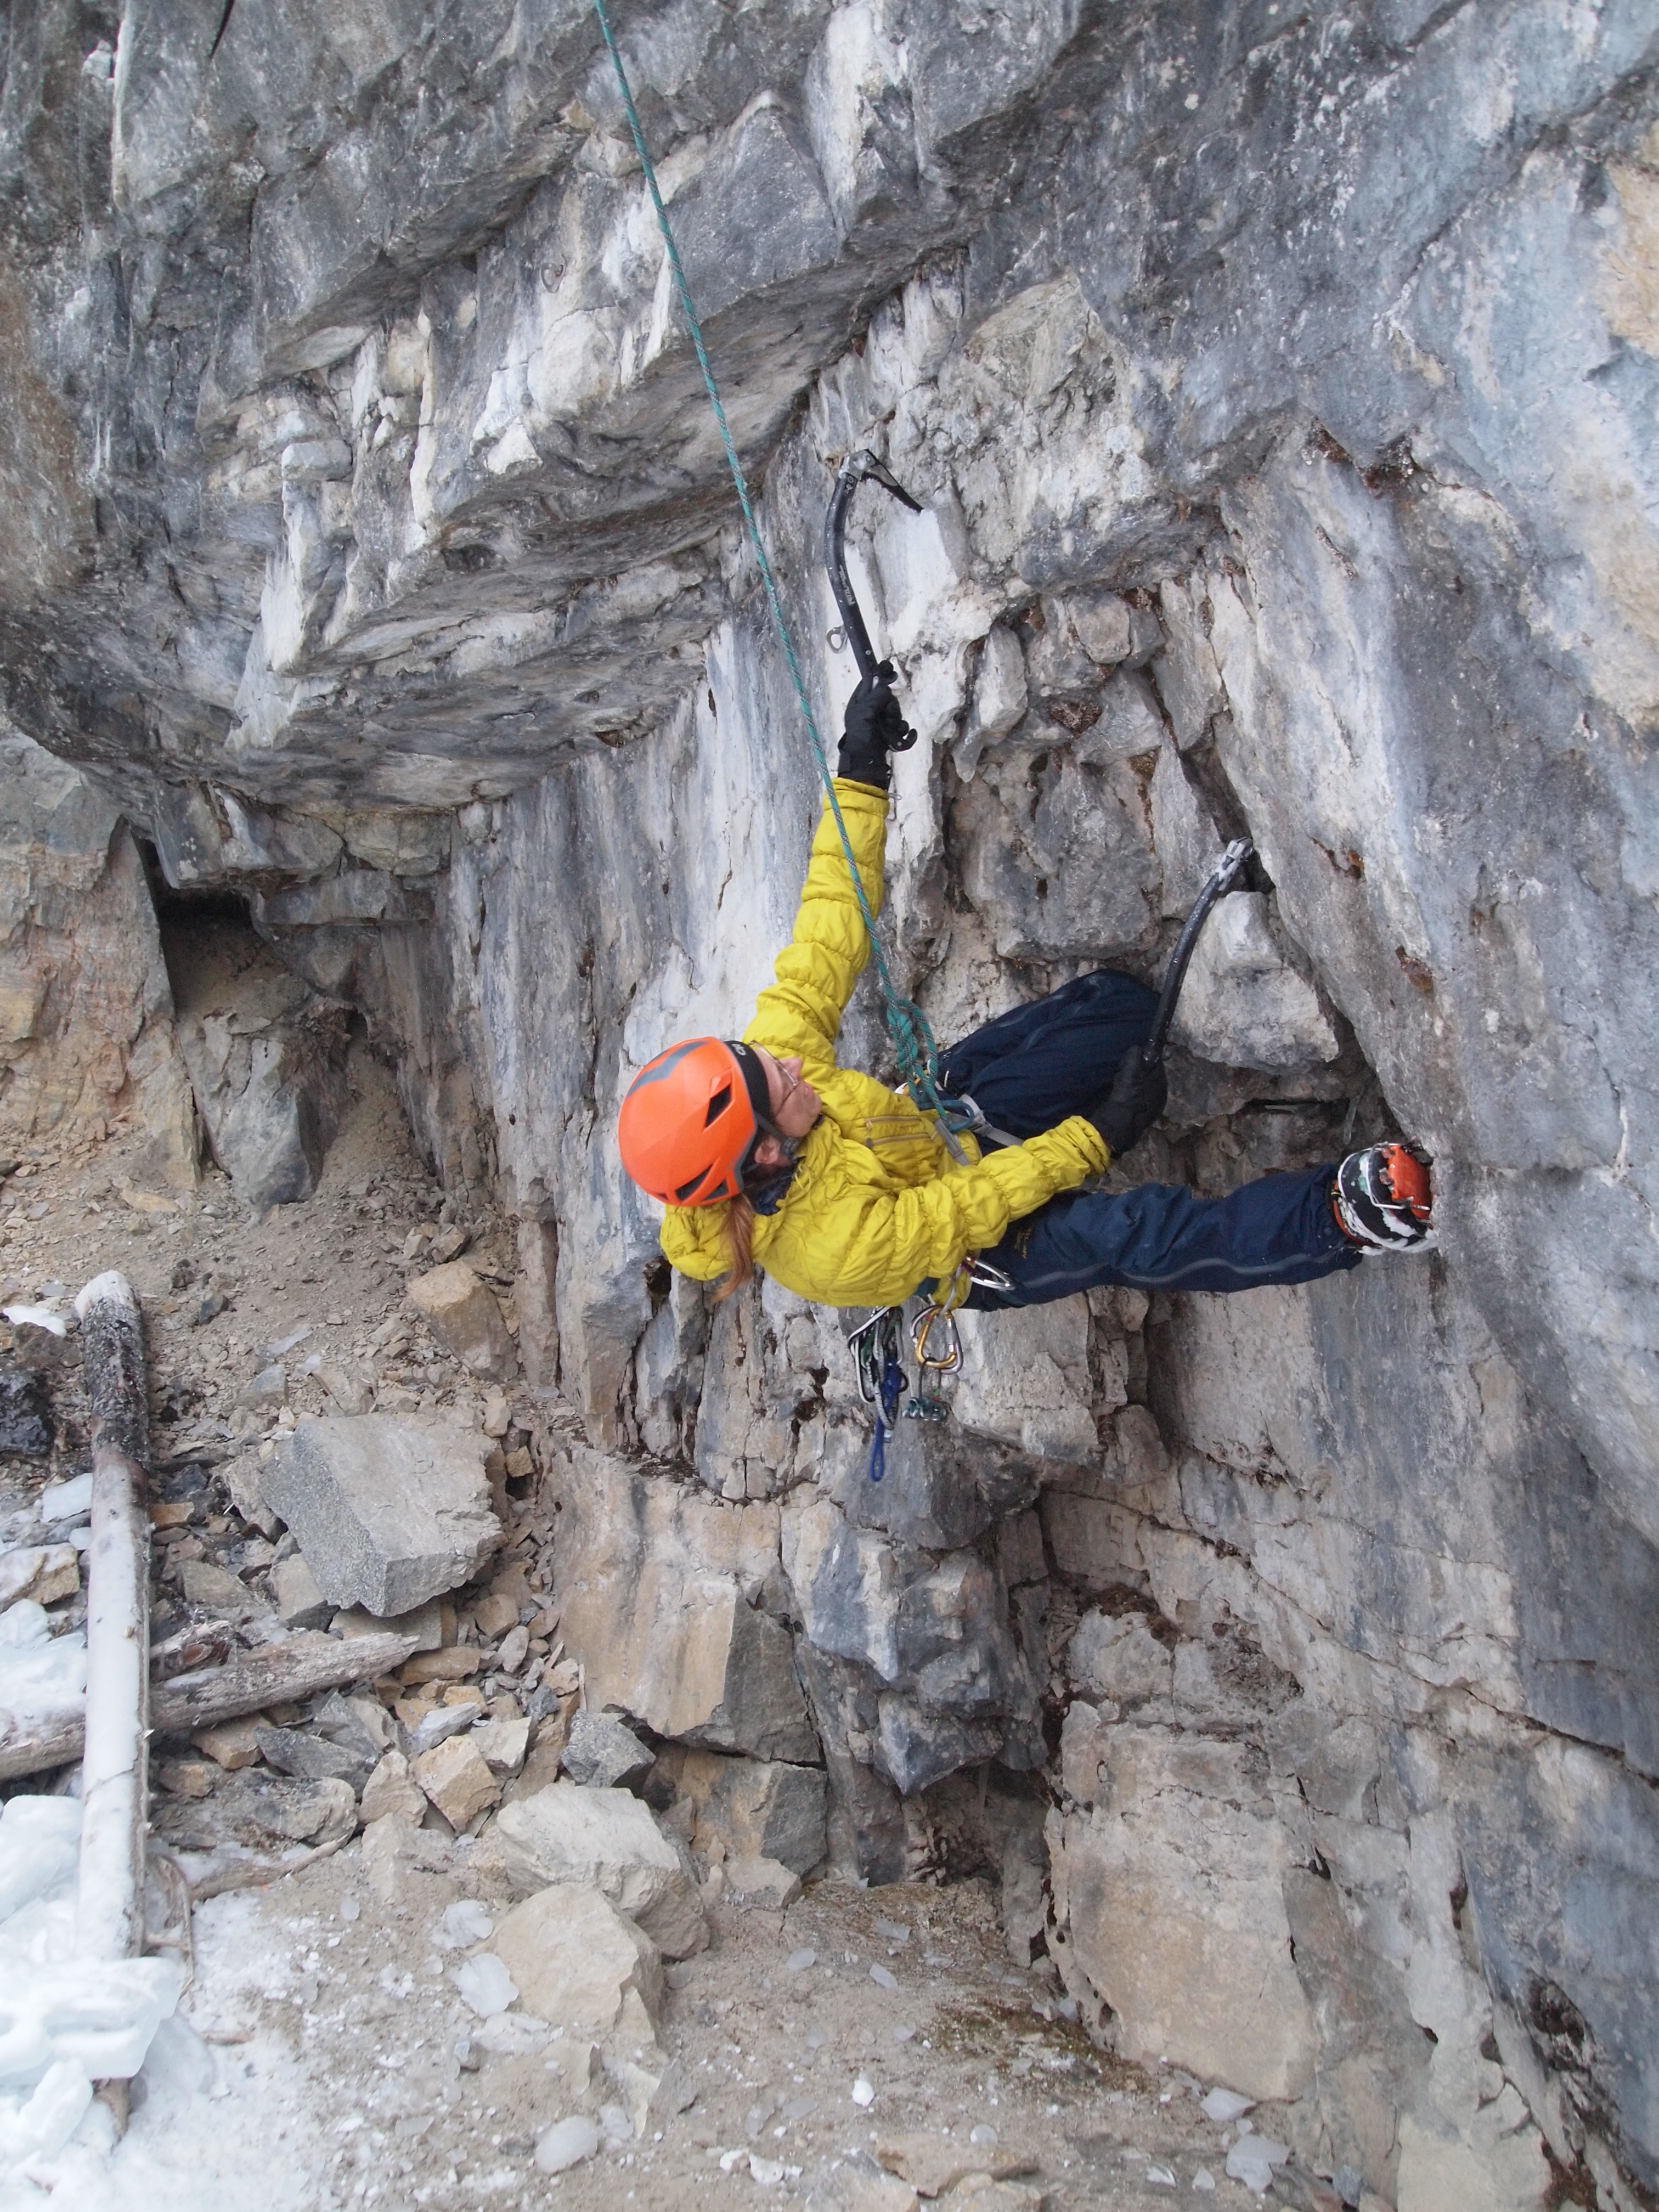
Me transitioning between rock and ice at Haffner Creek earlier this season…


The Mighty Munter Hitch (Or, Italian Belay Knot)

A Munter hitch is named after Werner Munter, a Swiss mountain guide born in 1941 (though, the Italians were using it before Herr Munter, which is why it’s also known as an Italian hitch or Italian Belay). The knot is a bit like a clove hitch and can be used to belay a climber if you have a handy carabiner. What’s coolest about the knot is the way it’s sort of reversible – flipped in one direction it can be used like a brake (say when your buddy has fallen into a crevasse, you’ve stopped the fall by walloping your ice axe into the glacier and then throwing your body weight on top of the ax, and then you need to stop your friend from slithering deeper into said crevasse… After quickly building an anchor – and the thought of having to do this with gloves on and while sitting on my ice axe is nothing short of horrifying – you would then use a Munter to secure the rope leading to your fallen friend… well, not exactly – first you have to take the weight off the rope by transferring the weight of the climber to the newly built anchor… gads. That was meant to be a simple aside. Turns out it might need to be a whole other blog post.) Flip the same knot upside down and you can use it to belay your friend, letting out slack to lower her to a handy shelf or taking in slack as she climbs up and out of the crevasse.

Here’s my handy dandy how-to guide (and specially produced video!! Thanks to Fabio for being a Munter model…)

How to Tie a Munter Hitch

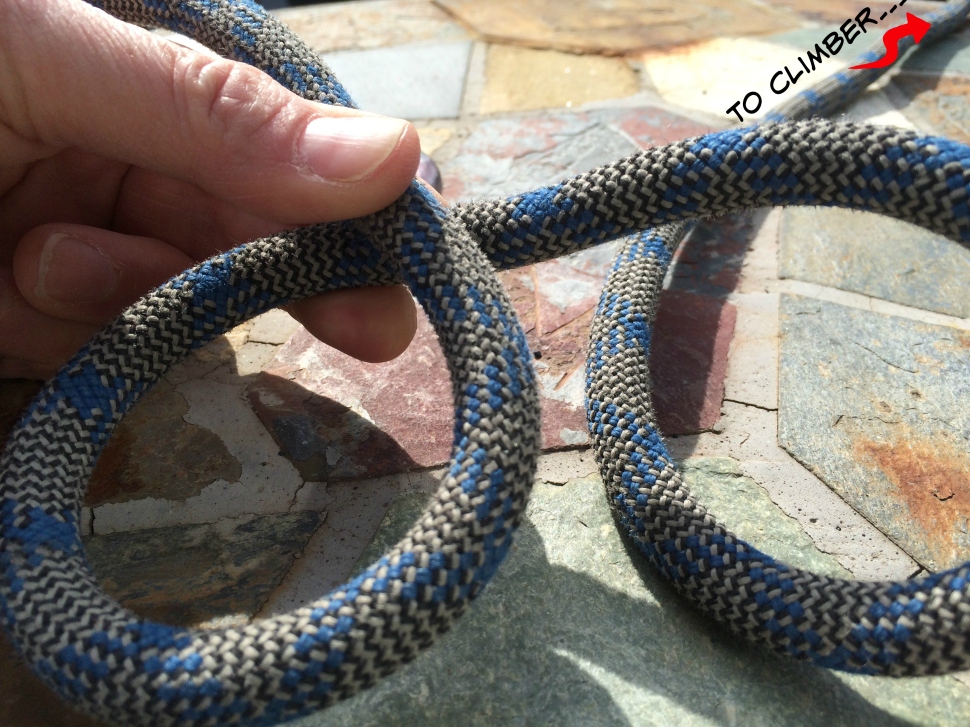
Step 1: Make a loop in the bit of rope that leads to the fallen climber. The end leading to the climber goes underneath.

munter 1.jpg

Step 2: Make another loop in the end of the rope that leads to your excess pile of rope (the end away from the climber). The excess end goes over the top.

munter 2.jpg

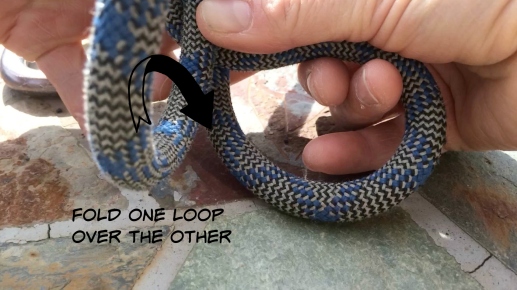
Step 3: Fold the rope in the middle to bring two loops together.

Munter 3.jpg


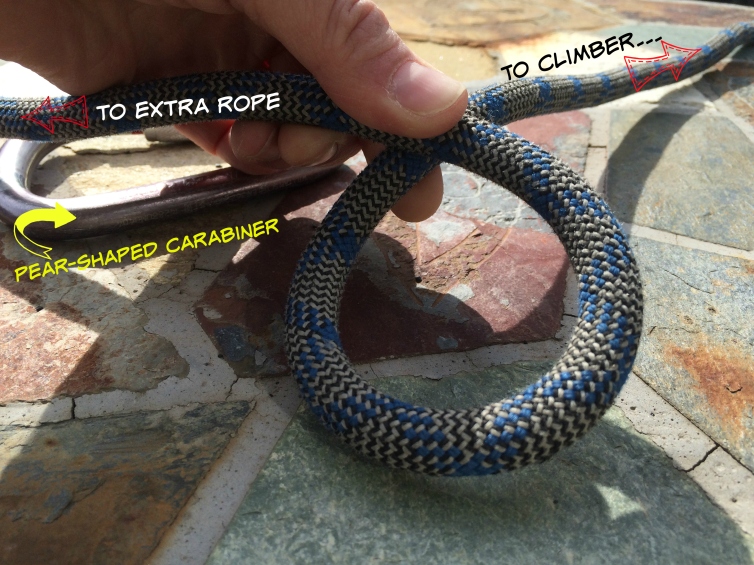
Step 4: Insert a carabiner (preferably a nice big pear-shaped carabiner) through both loops.munter 4.jpg

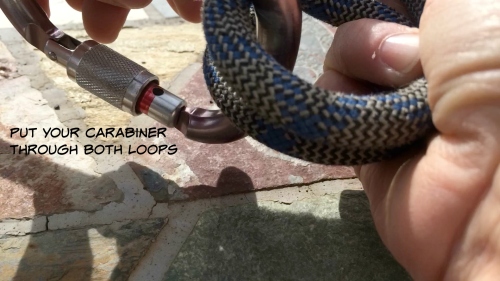
Depending how the knot is oriented (which was much easier to show in the video), you can either belay (play out rope) or stop the rope from running. Now you have to watch the video, to see what I mean about flipping the knot’s orientation… Trust me. This will be the sexiest 90 seconds of knot tying you have ever had the pleasure of watching… there’s even music.


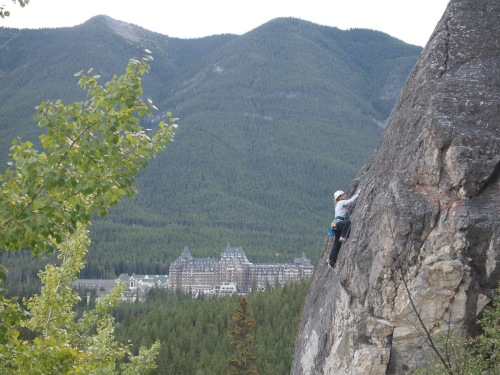
Mountains: I’m just going to throw the word in here because the entire world of rock climbing would disappear without them…

rundle 01-EFFECTS.jpg

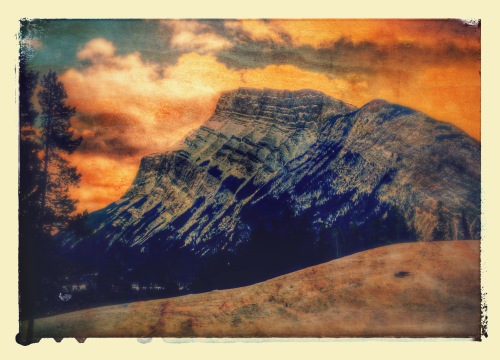
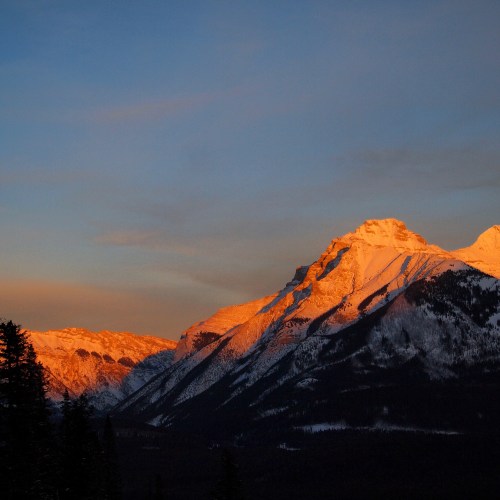
Here’s one of my favourites, the iconic Mount Rundle in the Rockies. The first mountain I ever lived on was the more diminutive Tunnel Mountain, which reminded me of a round-backed hedgehog-like animal sleeping in a bucolic valley surrounded by unfriendly giants. As a kid I hiked up the Banff side of Tunnel on various occasions and, because our house was on the lower flank of this modest lump, spent many hours building forts, exploring, and playing hide and seek in the forest behind our house. It wasn’t until last summer, though, that I had the chance to climb up the steep backside of Tunnel and quickly realized that, in fact, even though it’s dwarfed by much bigger neighbours, Tunnel is still worthy of its mountain moniker.

Nikki Tate Banff 2015.jpg

Mount Lady MacDonald is a popular hiking destination near Canmore. Here, she peeks over the trees at Grassi Lakes, where we were climbing yesterday afternoon. How handy that her name begins with the letter M.

IMG_2951.jpg

As for multi-pitches… well, another blog post, I guess! I am out of time… making that video was exhausting.

And then, there was ICE

IMG_6476.JPG

When it gets cold in the mountains and your fingers start seizing up when you touch rock, it’s time to dig out the ice climbing tools. Having had a  bit of practice dry-tooling, we set off on a search for climbable ice. This led us to some interesting places – King’s Creek where the skies opened and we were soon hiking through ever-deeper snow in the first big snow dump of the season…

Though there was lots of snow, the ambient temperature was still quite mild, so the climbing wasn’t all that great… Though, the proportion of ice to flowing water was definitely higher than our first effort on Grotto Falls.

After the blizzard, the temperatures fell and things began to firm up. We climbed Cascade Falls – twice –

Fabio leading up one of the lower pitches Cascade

Fabio leading up one of the lower pitches Cascade

Cascade Falls, Banff National Park

Cascade Falls, Banff National Park

Alpenglow

In terms of the view, it’s not a bad thing to be caught high on a mountain as the sun begins to set…

The first day we climbed all the lower pitches and ran out of light before we were able to climb the top pitch.

The next day we tried again and this time walked around the bottom three sections so we would have time to climb right to the top. The one small hitch in this plan was my total lack of experience and failing nerve right at the top. The ice was so thin up there it seemed like the water rushing underneath my feet was just as likely to suck the ice right off the rock and send it (and me) flying. In one place there was a huge hole in the ice and when I stood on the lip trying to collect my thoughts and convince myself going up was a good idea, my boot and leg got totally soaked by the waterfall rushing past and underneath me. My climbing companions for the day were totally unfazed by all this – apparently flowing water is just part of ice climbing – who knew?

OLYMPUS DIGITAL CAMERA
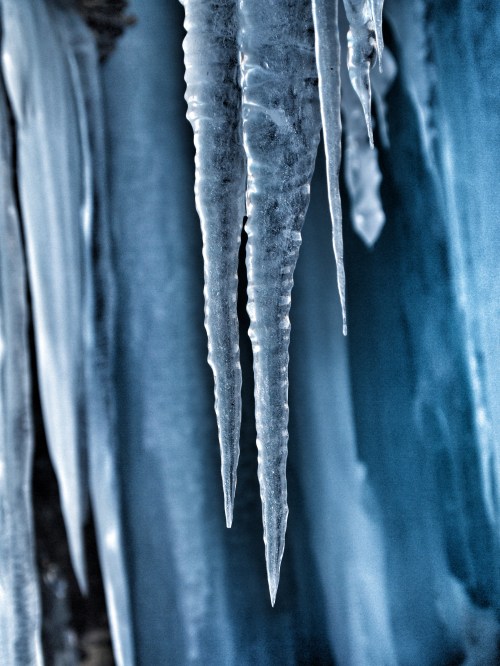
Wind, water, and chilly temperatures create wild ice sculptures at the top of Cascade Falls – Banff National Park

There was no disagreement about the beauty of the place. But right about where Fabio is (over on the right in the photo above) I had a total crisis of confidence and a complete failure in my minimal ice climbing skills and slithered off my precarious perch.

OLYMPUS DIGITAL CAMERA

Help me…

I slipped and swung sideways, landing in a sort of cave of icicles. There I waited patiently for Dan, the third member of our team that day, to climb up to where Fabio was belaying from up top to tell him that I wasn’t going to make it up and over the final, flimsy bulge and that I needed to be lowered back down to the previous anchor. To say this was a tad disappointing would be a huge understatement. It was frustrating for everyone, I think – and I now need to go back and climb Cascade a third time in order to see what lies at the top.

OLYMPUS DIGITAL CAMERA

This House of Sky

Our next expedition was to a climb called This House of Sky in the Ghost River Valley. This is rather an exciting destination even if you never climb anything as the approach involves a lengthy drive over a wilderness of snow drifts, rocky river bottom and then through the ice-choked river. Several times. The bottom part of the actual climb is not particularly difficult – it’s made up of a series of modest steps as the waterfall makes its way down a narrow canyon. It’s rather magical to make your way up through this secret passage, climbing ever upwards… The biggest problem was the warm weather – the lower pitches were absolutely soaking wet and crumbly. Delicate ice, is how Fabio puts it. He looks at stuff like this and salivates, relishing the challenge of climbing this type of thing gently. With finesse. Feeling you way up rather than bashing your ice tools into something remotely solid.

OLYMPUS DIGITAL CAMERA

Haffner Creek is a popular destination for ice, rock, and mixed climbing. It was a great spot to go for a mixed climbing clinic.

Though I did manage to more or less keep up on the climb up and over the various small waterfalls, I wasn’t exactly feeling competent. So, I signed up for a mixed climbing course taught by Sean Isaac. Fabio headed off to climb something actually challenging and I spent the day learning some basic techniques and practicing using my tools on routes that combined rock and ice. The day flew past and I had lots of fun learning about body position, kicking techniques, and ice tool swinging strategies.

PB292753.JPG

Getting to the top of a route in Haffner Creek

With my newfound skills (hah!) it was off to tackle Guinness Gulley. Managed to get up the bottom two pitches, though not without some issues. I had trouble negotiating the second one and slipped off when trying to retrieve one of the ice screws Fabio had put in on his way up. Normally, this wouldn’t have been a huge issue but I had parked one of my tools in the ice so I could unscrew more easily but when I fell I accidentally left one of my ice tools lodged firmly in the ice and well out of reach. People who actually know what they are doing don’t have much trouble climbing with one tool, but I was a bit flummoxed and determined not to have to be lowered down on another climb. I thrashed around getting ever more flustered, but managed to inch my way back up to where I was supposed to be in the first place. I suspect the initial problem was poor foot placement – both feet popped out when I was fiddling around with the ice screw – and as I crept up the ice with my remaining tool I realized just how poor my footwork still was.

OLYMPUS DIGITAL CAMERA

Joe on the third pitch of Guinness Gulley

At that point, it was all mental – I totally lost my ‘I can do this’ attitude (which seems to be a bit elusive on the ice anyway) and by the time I got to the top and looked up what seemed like an endlessly long stretch of ice in the next pitch, I was done.

IMG_6450

I sent Fabio and Joe on ahead and hunkered down against a rock to await their return. Quite honestly, I was thiiiiiiiis close to throwing in the towel and sticking to rock climbing, but then we decided to do a day of remedial ice. The fact this took place at one of the most gorgeous places on the planet (Johnson’s Canyon) did a lot to boost my flagging spirits.

PC042899.JPG

The bottom part of the Upper Falls at Johnson’s Canyon

The hardest part was lowering myself off the little lookout platform (where a steady stream of hikers stopped to watch the crazy ice climbers throughout the day).

OLYMPUS DIGITAL CAMERA

“Just lower yourself over the edge… Try to aim for the big rock.”

Coached by Fabio and Dan (relentlessly – neither of them really wants to wait days for me to fumble my way up stuff that really shouldn’t be that difficult…) I was drilled on kicking techniques, foot placement (and more foot placement), how best to orient the crampons to the ice, keeping heels low, moving beneath my tools, maintaining an ‘A’ shape with a single tool at the apex, feet wide and stable below, not moving on shaky tools, reading the ice for better tool placement, how best to swing, etc., etc., etc. until my head was spinning. However, climbing the same routes several times did a lot to build my shaky confidence back up and drill some basic techniques into me.

OLYMPUS DIGITAL CAMERA

Practice, practice, practice… 

All of this came in very handy on our second trip to This House of Sky… but that will have to wait for another blog post as this is already way too long.

OLYMPUS DIGITAL CAMERA

On Cascade Mountain